

WTF is Pre- Production: Creating a shot list.
You need to get into the details now.
You thought I was done with this series? Hell no, I just had some other bits I wanted to say.
Welcome to our, hmm wait let me quickly count this, one- two- three- four- five- six- seventh instalment of ‘WTF is Pre-Production’ a series on our Substack dedicated to unpacking the complexities of preparing for a ‘shoot’.
Wow a lot goes into preparing for a shoot right? Exactly, so you better get well versed in it. Which is exactly what this series is for.
If you are new, hello there baby, you have a few bits to catch up on but let me add them in a fab little list for you here (aren’t I sweet):


Where we last left off was that you had chosen your crew, ace, hopefully you are all working harmoniously (fingers crossed). But now its time to really dig your knuckles into the particulars of the shoot so that everyone is on the same page.
Today’s post my darlings, is how to create a shot list?
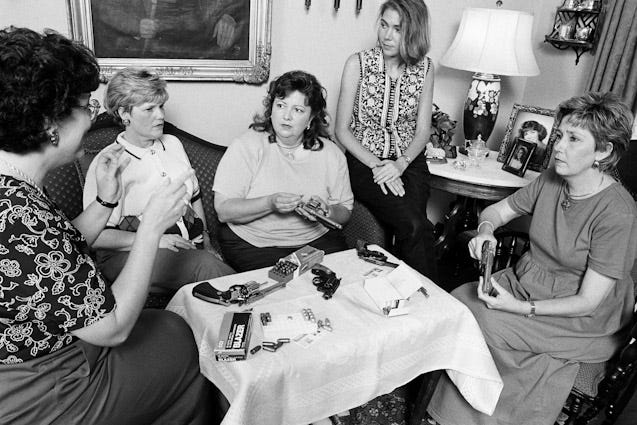
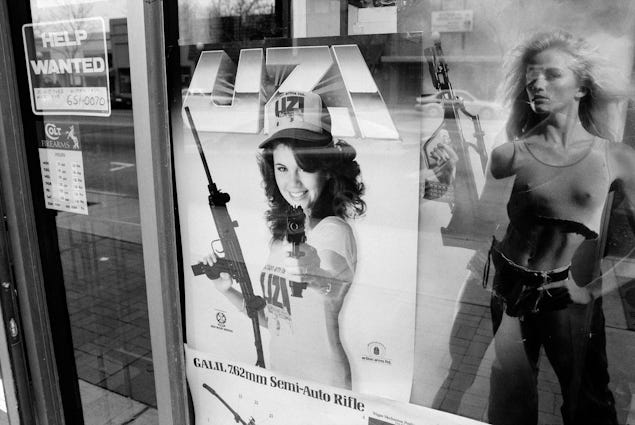
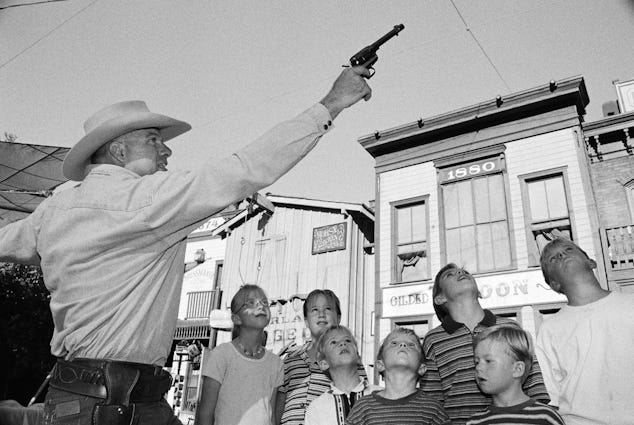
To accompany this article, we have images from ‘Gun Nation’ by Zed Nelson. A book & series following the US’s relationship with firearms.
What is a shot list?
A shot list is essentially a very detailed description of each image you are looking to capture on the shoot day, in quite excruciating detail. This isn’t exclusively about setups, this is about each individual deliverable you need to achieve. For example if a certain deliverable is a still life image of a trainer we need to know what that will look like from the set, to lighting, to image composition. It’s the equivalent to a storyboard for video. It’s a tool that shows the client & crew exactly what we are looking to achieve.
In preparation.
Whilst you should by now, through all the prep & conversations you have already had, know quite well what you are looking to achieve in each frame. It’s really important to make sure you are up to date with each department on their most recent boards. Talk with styling, production design, props, MUA & make sure you have the their latest decks that have either been approved, or are in the process of being approved by client. Whilst I would suggest referring back to the original brief, which isn’t a bad idea, projects can evolve & adapt in the early stages of pre-production with clients changing scope, or as a solution to production logistics. Usually the agency/ production company will have been updating their briefing decks with the client as these issues have been addressed, much like you have with each department, check with the agency or production for their latest client deck & any big questions or issues clients are still facing that can be addressed in the shot deck itself.
How to lay it out.
As I said before this document is to provide clarity & be used as the foundational reference point for each department, therefore each aspect needs to be included & aligned (hence you being updated by everyone beforehand). This document will be being used to create the schedule of the day, how much time is awarded to each setup & as such needs to leave no room for interpretation. It has to be as prescriptive as possible.
I would suggest using a presentation software, like a Pitch, Google Slides, Powerpoint. Then break up each page per deliverable.
So let’s say you are doing a shoot for a makeup line- one shot might be:
Product Shot- Mascara- Close Up
or
Portrait- Dua Lipa- Mascara
Another example would be kit launches for football clubs where you might need a few people with the same products:
Fully body- Lionel Messi- Club Shirt
Close up- Lionel Messi- Holding Boot
Mid Shot- Christiano Ronaldo- Club Shirt
You get the gist. You need to breakdown each page in accordance to these separate deliverables.
The ONLY way you may not need to do this, is if you are capturing a ridiculous amount of content. Here you can instead club certain types of images together, usually by what you are capturing & the place/ set you are capturing them on.
e.g. Product Shots- Blue Background, Mid Shots- Club Changing Room.
The page then would be titled whatever that deliverable is & you would break it down on that page with the below segments:
Lighting
Composition
Styling [if applicable]
Cast/ Model [if applicable]
Set Design/ Props [if applicable]
Makeup [if applicable]
You don’t need to go into any form of overall written detail, this is more of a visual board naturally, but some small one line descriptions are beneficial. Mainly for the sake of lighting & composition.
Below is a very very bare bones example just to illustrate what I’m talking about.
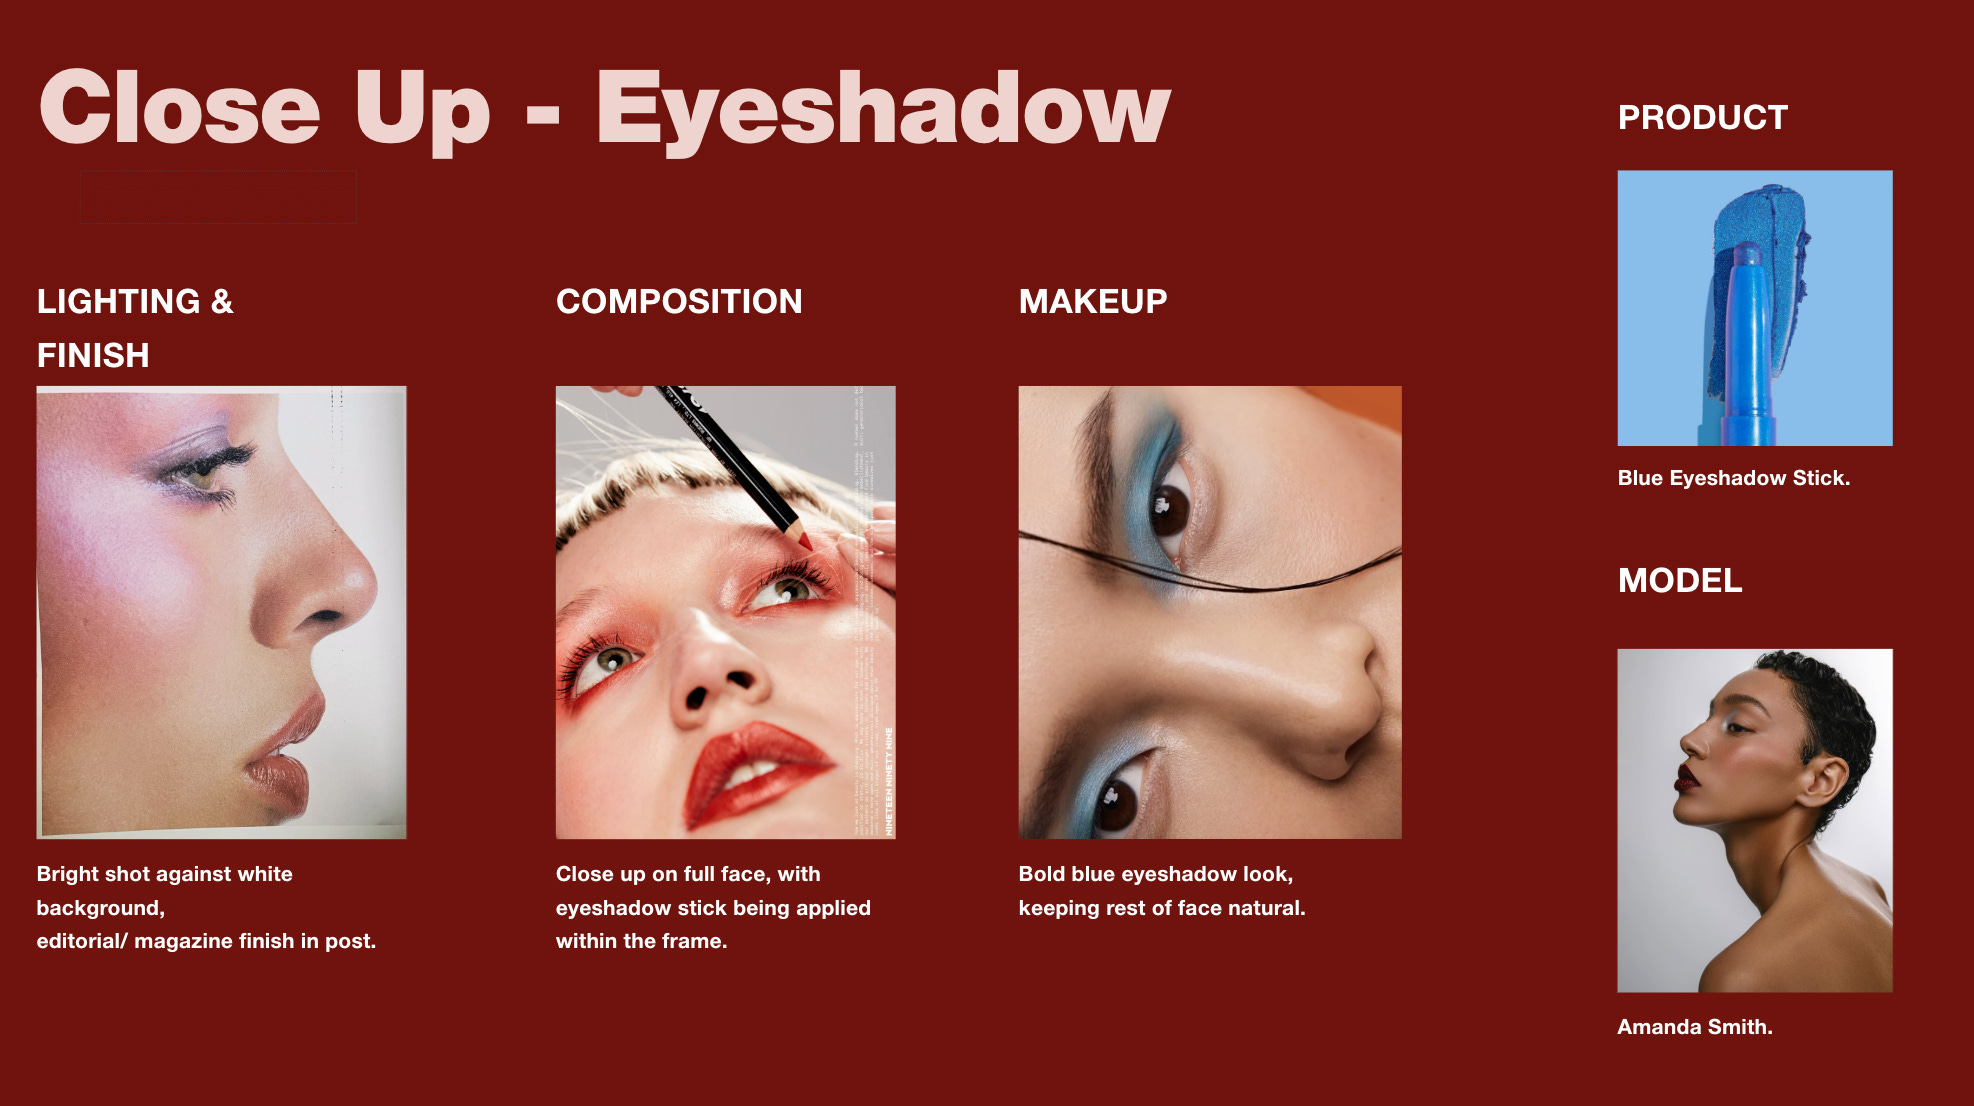
Be very particular with your references.
As I mentioned, this board needs to be as clear & prescriptive as possible. Therefore any references included need to be exactly (or as close to what you can find) what you are going to execute. The great part of breaking down the shot in these categories means that you can find very specific refs for each category, without trying to find one ref that hits the composition/ lighting/ styling/ makeup all in one.
Remember: this shot list is being sent out to every department & will be used as their reference points on the day of the shoot. This shot list is usually printed & pinned to consistently refer to by you, agency, client & crew. Take your time with the references you are finding & the way you are breaking down each shot. It is worth the effort in the long run.
For example in the blue eyeshadow example above, as we said its a bright lighting style, on a white backdrop, to look like a magazine style in post:


Don’t include anything you cannot execute.
Continuing on from the above point. Do not include unachievable references, either in regards to skill set or with the budgetary confinements. Including a lighting reference that would be possible with a 2k budget, but you have £500 is just setting yourself up for failure. As on the day when the client is looking at the shot list & then what you are delivering, they’ll see the disparity & question why the former was promised.
If you have any more questions in regards to how to create a shot list please let me know! Our next & final article for ‘WTF is Pre- Production’ will be on how to handle a PPM. Then we’ll be moving on to Production itself.
Before then if you aren’t caught up on the series make sure to do so via the links at the start of the article. Our full archive costs only £3 per month (less than a cup of coffee) & if you haven’t already been a paid subscriber you have a free trial to look through our previous content & take notes.
& if you haven’t already make sure to sign up to our free subscriber chat.
